Google Tag Manager, or “GTM,” is an incredibly useful piece to add to your digital marketing toolbox. With GTM, you’re able to conveniently manage tags from a web-based user interface, configuring and instantly deploying them on your websites and apps in order to amass data on user experience and behavioral analytics. When you add Google Tag Manager to Shopify, you’ll be able to make informed decisions about your site to increase session durations, and ultimately, conversions.
To add Google Tag Manager to your Shopify Checkout Page
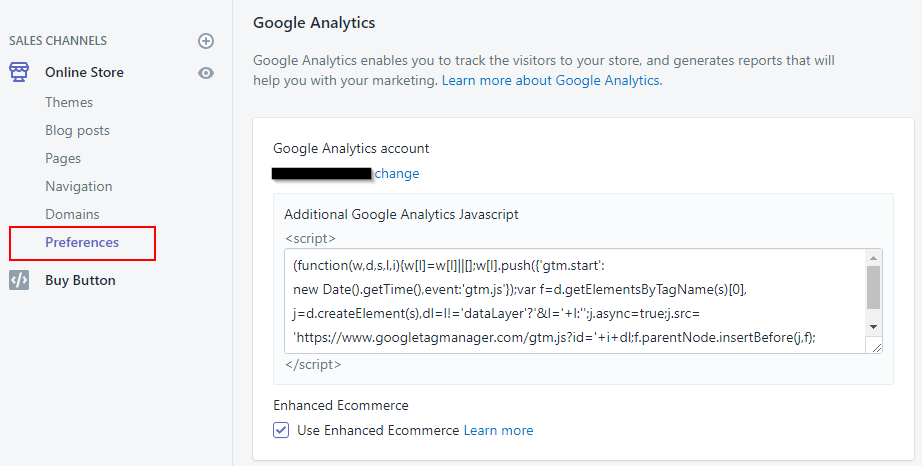
- Log in to the Admin interface
- Go to the “Online Store” option and select “Preferences”
- Under the “Google Analytics” section, Select “Add custom JavaScript”
- Add your GTM code, and be sure to exclude the script tags (Shopify will enclose the content you enter in script tags by default)
This will install Google Tag Manager for your whole Shopify Store INCLUDING the checkout pages.
You’ll get the standard “optimization suggestions” from Tag Assistant (placement,script missing) but it should work for conversion tracking and most other applications.
To address the missing body script optimization
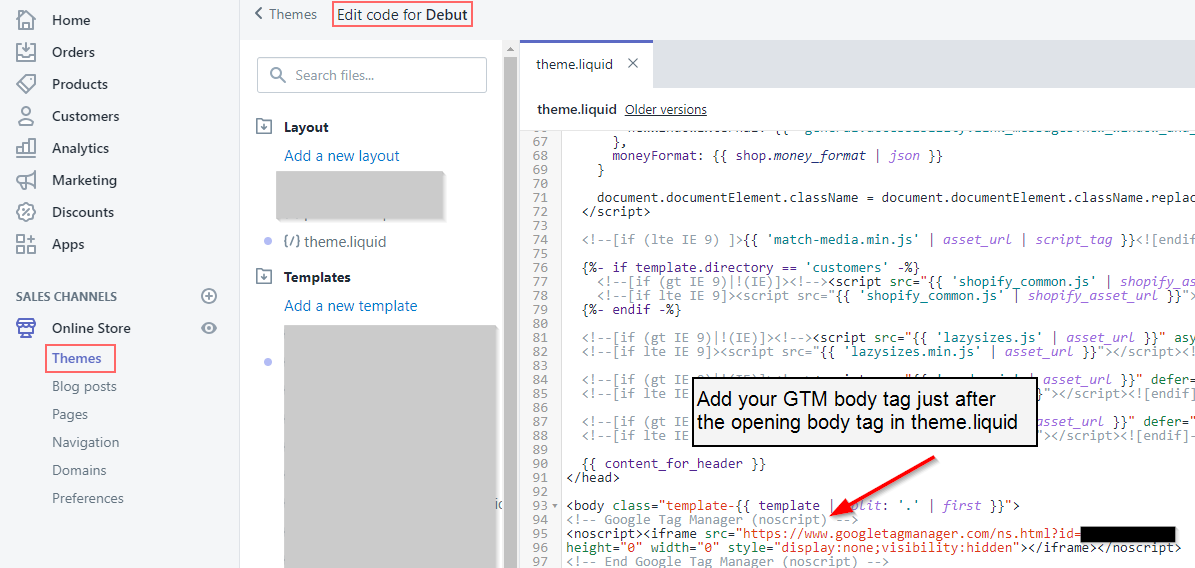
- In the admin interface, on the left menu, under Sales Channels
- Select Online Store -> Themes
- Under “Current theme” click “Actions” -> “Edit Code”
- Select “theme.liquid” under Layout and add your GTM body tag
- Save your changes
This will only address the store in general – not the checkout page (I believe you need Shopify Plus to edit that piece, which starts around $2000/month). Keep in mind if you implement the tag using both methods described above, you will get duplicate GTM tags and may risk screwing up your data.
Want us to do it for you? Email us at [email protected] and reference this article!