Learn to filter and block an IP address and test the Google Analytics IP Filter
After installing Google Analytics on a website it’s important to take additional steps to ensure the quality of the data collected. This includes filtering traffic from internal IP addresses, addressing (not set) values in reporting, excluding bots/spam traffic, etc.
This series of posts will illustrate how to take these steps, and how to appropriately test that your changes are working.
Filter Internal Google Analytics Traffic
Filtering internal IP addresses from your analytics reporting is critical. Users navigating to your site from your networks / IPs will often have very different behavior from the users you intend to target with your site. The source and referrer of traffic, number of pages visited, time on page, navigation, conversion tracking, etc. can all be thrown off by people within an organization. Generally, you do not want this data included when making decisions based on user acquisition and behavior on your site.
Here’s how to filter specific IPs on your Google Analytics report:
- Get your external IP and Internal IP. For this example we’ll use 93.184.216.34 and 192.168.1.1 as our external and internal IP addresses respectively.
- External IP: Google “what is my ip?”. Google should load an answer at the top of your search results.
- For your internal IP:
- Windows: Open a command prompt (cmd.exe), run ipconfig /all and look for the IPv4 Address value.
- Mac/Linux: Open a terminal and run ifconfig and look for the “inet” value. It usually will start with “192.168”, ex: 192.168.1.30
- Log in to Google Analytics
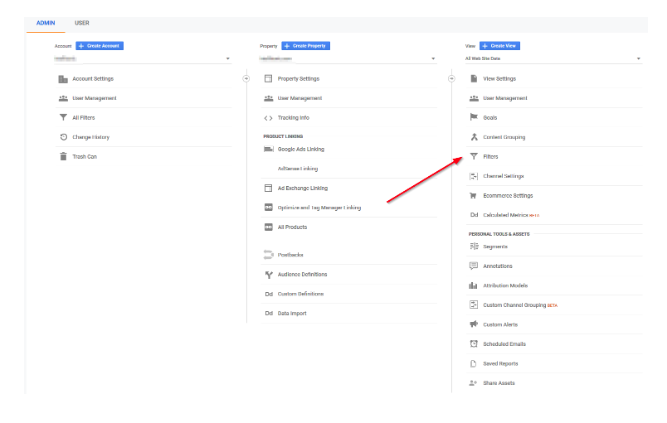
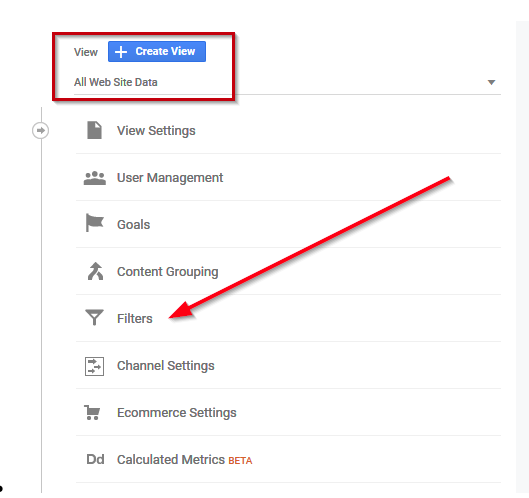
- Click the gear in the bottom left, select the account, property, and view that you’re planning to add a filter to
- Click the “All Filters” section
- Click “+ADD FILTER”
- Name your filter (Ex: Internal IPs)
- Filter type: Custom, Exclude
- Select “IP Address” as the filter field
- For the pattern, this will match both our example external IP and a range of our internal IP addresses – replace the values with your IPs: (93\.184\.216\.34)|(192\.168\.1.\d{1,3})
The reason we write (93\.184\.216\.34)|(192\.168\.1.\d{1,3}) instead of 93.184.216.34 and other formats is because the field is expecting a “Regular Expression” pattern. Read more on what is a Regular Expression? - Click “Save”
How to test the Google Analytics IP Filter using Google Tag Assistant
- Install Google Tag Assistant
- Log in with an account that has admin access the Analytics account for the site you’re testing. It’s a good idea to log out of all other accounts or there’s a good chance the test will fail.
- Navigate to the site
- Open Tag Assistant in a new tab (click the browser extension, open the menu and click “Show in separate tab”
- Click “Record” on your Tag Assistant tab
- Refresh the website you’re testing
- Click “Stop Recording”
- Click “Show Full Report”
- Click the “Google Analytics Report” on the top of the report
- Click “Change location” in the left menu and “Use my externally visible IP address” or specify an IP and click “UPDATE”
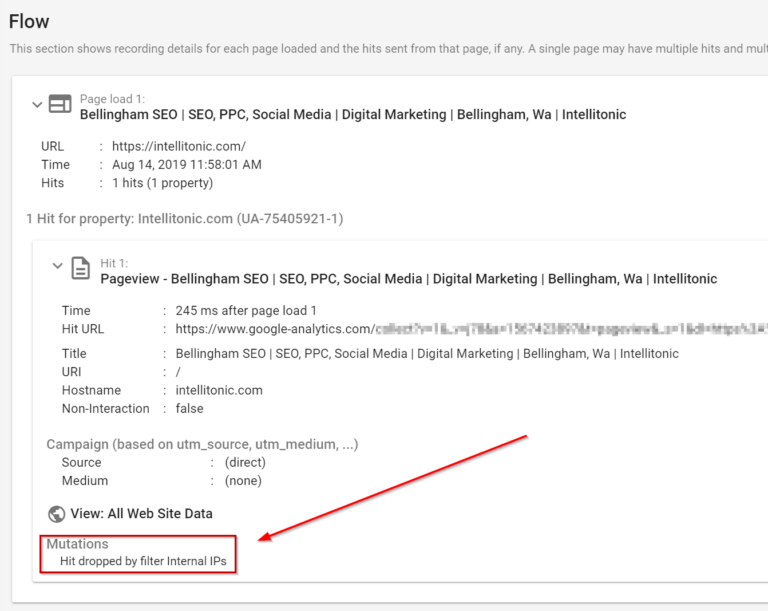
- Scroll to the bottom of the report, and under “Flow” expand the page load that was recorded
- Expand the “Hit for property” section
- Under mutations, you should see “Hit dropped by filter “Internal IPs” or whatever you named the filter
- You can try other IP addresses in and out of the range you specified to verify the filter is working.
- It’s worth reiterating that if you’re not logged in as a user that has Admin / Filter access to Analytics for the domain you’re evaluating, you will not see the mutation.