

Setting up simple conversion tracking for Google Ads in Shopify will provide you with useful analytics, and only takes a few minutes to set up. Here’s a quick summary of the steps:
- Install Google Analytics Shopify
- Enable “Enhanced Ecommerce” in Shopify
- Enable “Enhanced Ecommerce” in Google Analytics
- Link the Google Ads and Google Analytics accounts
- Import Google Analytics transactions in Google Ads
Before you get started, make sure you have access to:
- Shopify
- Google Ads
- Google Analytics
How To Set Up Conversion Tracking in GA:
Google Analytics
- Login to Google Analytics
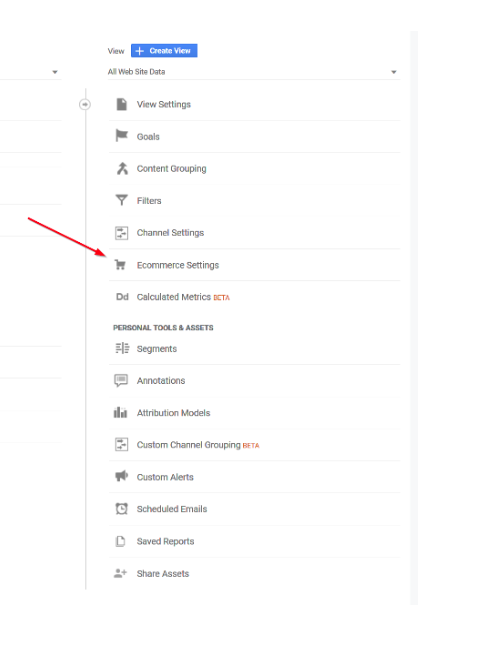
- Click Admin in the bottom left hand corner
- Under All Web Site Data, select Ecommerce Settings
- Switch the Enable Ecommerce settings from Off to On. Do the same for Enable Enhanced Ecommerce Reporting
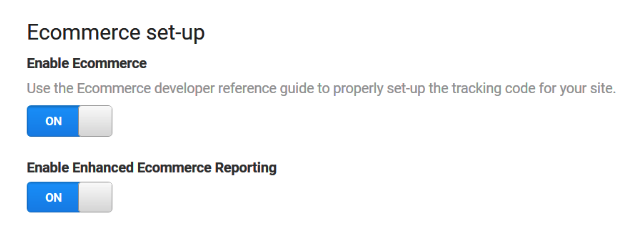
- Click Save
- Select Goals under All Web Site Data
- Select +New Goal to track purchase completions, appointments, etc. and select Continue
- Enter a name, select the goal type, and Continue
- Complete the goal details and select Save
- Under Property, select Tracking Info / Tracking Code
- Copy the Tracking ID e.g. “UA-12345678-9”
Shopify
- Login to Shopify
- Go to Online Store / Preferences
- Paste your copied Google Analytics UA code
- Check the “Use Enhanced Ecommerce” box
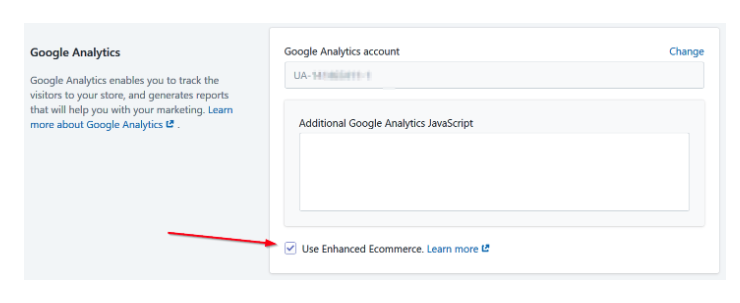
- Click save
Google Ads
- Login to Google Ads
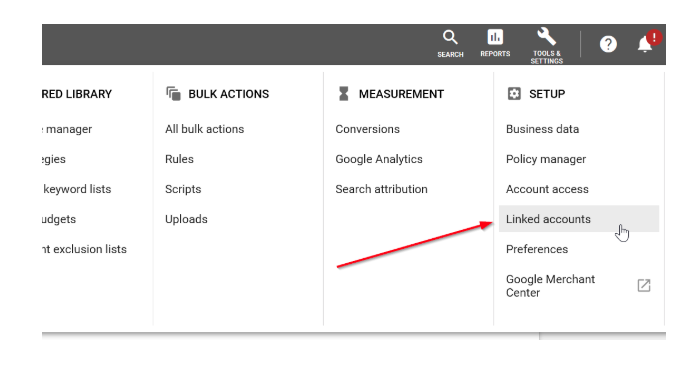
- From the top menu, select TOOLS & SETTINGS and then Linked accounts
- Under Google Analytics, click Details
- Find the relevant Google Analytics property (there may be multiple associated if you have multiple accounts) and click LINK – for most cases you can flip both Link and Import site metrics for the All Web Site Data view and Save
- Back in TOOLS & SETTINGS, under MEASUREMENT, select Conversions
- Click the blue + symbol to add a new conversion
- Select Import / Google Analytics / Continue
- Select Transactions (All Web Site Data) and any other relevant goals
You’re done!
After completing this step, the tracking status will probably remain in “No recent conversions” until a valid conversion comes through one of your ads. Conversions should be tracked along with the value of the purchase. Click here if you need help adding Google Tag Manager to a Shopify checkout page.