
Optimize Images For Web:
Learn how to check image format, resolution, dimensions, and more.
When it comes to hosting images on your website, there are several factors that make a difference in the quality, display, and loading speed, each of which greatly affects the end user experience. The size, resolution, file format, and level of compression all play a factor. If you’re new to working with image files, this guide will show you how best to optimize your images, and increase your website’s engagement.
How to measure an image
Let’s explore different ways to measure image size and what each term means.
Pixels: Every digital photo and digital graphic is made up of pixels. Pixels are the smallest controllable and addressable pieces in an image, and are otherwise known as picture elements (one being a picture element). They are usually round or square. If you’ve ever worked in Adobe Photoshop or Lightroom and zoomed all the way into an image you can see them as an abstract grid.
Resolution: The amount of detail an image holds. The higher the level of resolution, the higher the level of detail. Image resolution is measured in pixels per inch (PPI) or pixels per centimeter (PPC). A general rule of thumb for web is 72 PPI. This is often enough information to showcase a beautiful image. *Note this is true for screens up to about 28 inches wide. Less than this will result in a “pixelated” image. (See below for example.) For print, 300+ PPI is generally needed to create a seamless-looking image to the naked eye.
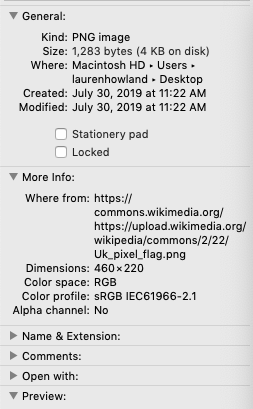
Image Dimensions: The length and width of a digital image. Depending on the platform you use, you can measure the image by pixels, inches, or centimeters. You can also get a sense of size by right clicking on the image, and then clicking on “get info”. As an example, the file format is under:
(Example)
More Info:
Where from:
Dimensions: 460×220
What does DPI mean?
DPI is short for dots per inch (not to be confused with PPI, or pixels per inch.) DPI is used to describe the resolution when printing. Similar to digital resolution, higher DPI creates a more detailed image when printed and allows for a larger printed image. Printers vary on how much detail they can print. For instance, your home printer has a much lower max level of detail than a professional one. DPI can get confusing, so if you need more clarification on printing and DPI, check out this wikipedia article.
Print vs. Web Color Systems
Each file format uses a base color system to showcase colors in a design.
RGB: red, green, blue
This is used for screens. Screens emit light and need less color complexity.
CMYK: cyan, magenta, yellow, and black
This is the color system used for print. Paper absorbs light and needs a more complex color assortment. This means a picture may appear differently in print than it appears on screen.
Bytes and storage
A byte is the smallest addressable unit of memory in many computer architectures. The more bytes an image has, the more memory it takes to store. Many web host providers have limits to image size, and won’t let you upload anything larger. For example, WordPress does not allow you to upload an image bigger than 2MB and SquareSpace has an image byte max of 20MB. This is a failsafe to save space and keep your website running smoothly.
You can tell how many bytes an image has by right clicking on the image, and then clicking “Get Info” on a Mac, or “Properties” in Windows. As an example, the file format is under:
(Example)
General:
Kind: PNG image
Size: 1,283 bytes (4 KB on disk)
Common image sizes for web are in the kilobyte and megabyte range. Very high quality images can be in the gigabyte range.
Kilobyte (KB): Approximately 1 thousand bytes
Megabyte (MB): Approximately 1 million bytes
Gigabyte (GB): Approximately 1 billion bytes
Types of image compression
Image compression is used to reduce memory needed for storage and increase transmission (loading speed) on a web browser. Compression happens in different ways based on the type of file format you choose to use.
There are two major types of image compression: lossy and lossless.
Lossy Compression: This type of compression results in lost data and, therefore, potential lost quality. Lossy compression is great for images because oftentimes the difference is negligible to the naked eye. For example, the JPG format uses lossy compression, and can reduce an image’s file size by up to 80% (making this a great way to store and host images).
Lossless Compression: This format is used mostly for archival purposes when the original image must be preserved. While there is no change to the quality of the image, the file also stays roughly the same size. PNGs and GIFS both use this type of compression.
Popular image file formats
There are several file formats used across the web. You can tell what format the image is by looking at its extension after the name (e.g. testimage.png) or right clicking on the image, and then clicking on “Get Info” or “Properties.” The file format is under:
(Example)
General:
Kind: PNG image
RAW: “Portable Networks Graphic” is a collection of unprocessed data. There are different types of raw data files, but the most commonly used in this context is “Camera RAW” which is what most professional digital cameras create images as. These files typically cannot be uploaded directly to a website server due to their immense size, and must be edited using a specific computer program such as Photoshop, and saved as a more commonly used format like the ones below.
JPG: “Joint Photographic experts Group” is arguably the most popular and versatile format for uploading high-resolution photos to the web. This format supports over 16 million colors via the RGB color system, and lossy compression, making it ideal for use on the web.
PNG: “Portable Network Graphics” has many of the same benefits of the JPG format, including color detail. The major difference between the two is that PNGs only use lossless compression, making them generally larger files. PNG format also supports 256 levels of transparency in addition to the RGB color system, meaning PNG pictures can have transparent backgrounds or a see-through effect. (The JPG format does not support transparency). If you want to make a ‘clipped,’ as in partially transparent, image to place on a background on your site – it will need to be a PNG file. The PNG format is the best option for logos, small symbols, and low-resolution cartoons.
GIF: “Graphics Interchange Format” is the most popular format for quick, low resolution video clips and animated images. This file format also only uses lossless compression, meaning no data will be lost. Unlike its cousin, the PNG format, GIF uses indexed color. This means that it has a maximum color profile of 256 colors vs 16 million.
What’s the best size image for web?
Unfortunately, there is no one-size-fits-all for which image size to use. A good rule of thumb is to try to make the image as small as possible without sacrificing quality. (Remember the 72 PPI rule). The smaller the image, the better the load time. If you already have several images on your website that you’d like to optimize, try some of these great optimization plugins in our blog post on general site speed optimizations.
Popular CMS image sizing recommendations and restrictions
Software for changing file formats and size
It’s a great idea to get in the habit of using a program to edit your images. Editing image size, resolution, and file format is easy and will make a big difference on your website. Here are some good ones to use:
- Photoshop – $10/mo, complex file editing Adobe program
- Gimp – free, open-source editing program
- Pixlr – free application for basic editing
- Photopea – free application that has similar look/feel to photoshop in browser. It can also open photoshop files.
- Paint (Windows) – free program that comes with a PC, very basic editing program